Friday, March 30, 2012

To Sprout or Not to Sprout...

Okay, so I'm feeling a bit dramatic today.  Why? Well it's Friday!  If that isn't enough, I've been in the garden this afternoon enjoying the heat, the sunshine and aroma of bee-friendly flowers and dirt.  Best of all, I don't have to work tomorrow!
Sprouted Mung Beans
I have been growing/eating sprouts for a while.  I sprout "cat grass" which is actually wheat grass, for our 2 cats and they LOVE it.  I sprout Mung Beans for stir fry and Alfalfa for sandwiches and salads.

Sprouts are nutrient dense and take up almost no space.  If you want fresh veggies without having to grow a garden, sprouts are the way to go.  Do you know that a small box of Alfalfa sprouts at the grocery store cost about $4.  That's ridiculous!  
For $8 you can get 8 ounces of seeds, which will make about 20 boxes of sprouts.  Most important, by growing your own you are in control of your food.  You can decide when to grow, how much to grow and grow them organically.

Don't be scared to try something new.  Don't let Sprouts intimidate you.  Take control of your food! (Fist in the air, that's me the drama queen)  Seriously, it's not difficult and it's good for you.  Don't believe me?  Below are the facts:

Alfalfa sprouts according to LiveStrong:

Alfalfa sprouts contain only 8 calories per serving, making this crunchy food an ideal choice for people who are trying to lose weight. Self magazine grants alfalfa sprout a five-star rating as a weight loss aid, noting that it is low in calories, sugar, fat and saturated fat. Additionally, because alfalfa sprouts are rich in fiber and protein, they may help to facilitate sensations of fullness for people who tend to overeat.

Alfalfa sprouts are a good source of several micronutrients, or vitamins. NutritionData reports that alfalfa sprouts contain B vitamins such as niacin, thiamin, riboflavin, folate, pantothenic acid and vitamin B6. Additionally, alfalfa sprouts provide roughly 13 percent of an adult's recommended daily intake of vitamin K. Because of alfalfa's high vitamin K content, the National Institutes of Health advise patients taking blood-thinners to avoid foods and supplements made from the plant.

Broccoli sprouts according to Livestrong:

Eating broccoli sprouts may be able to protect people from cancer, according to scientists from Johns Hopkins. The Maryland-based researchers found that young broccoli sprouts contain a substance called sulforaphane in concentrated amounts. Sulforaphane helps the body fight cancer, and may prevent certain cancers from developing. Researchers call this phenomenon chemoprotection.

Asthma sufferers may benefit from a daily dose of broccoli sprouts, as studies have shown a decrease in inflammation of the airways after eating the vegetable. A study reported in the March 2009 issue of Clinical Immunology reports that sulforaphane, the same compound that can prevent and fight cancer, reduced inflammation associated with asthma and nasal allergies. In addition to broccoli sprouts, sulforaphane is naturally occurring in cauliflower, mature broccoli, brussels sprouts and cabbage.

Fenugreek sprouts according to Livestrong:

Fenugreek sprouts provide a large source of protein and a smaller amount of carbohydrates due to the sprouting process compared to other legumes. The soaking process of seed to sprout allows for enzymatic reactions to occur, providing easily digested proteins. The enzyme amylase breaks down complex carbohydrates found in the seeds to simple carbohydrates that are washed away during the rinsing process. Lipase, an enzyme that breaks down fat, creates a usable form of fat that is easily absorbed in the body.

Fenugreek can be used as spice, digestive aid, hair growth supplement and expectorant. Fenugreek may help stimulate milk production in nursing women and may aid in menopausal symptoms such as hot flashes and breast tenderness. Fenugreek may also help to naturally lower cholesterol and aid in blood-sugar control in people who have diabetes.

Fenugreek provides a variety of vitamins, minerals, proteins, healthy fats and fiber. One teaspoon of fenugreek contains 12 calories, 0.85 g protein, 0.24 g fat, 0.9 g fiber, 7 mg calcium, 1.24 mg iron, 7 mg magnesium, 11 mg phosphorus and 28 mg potassium.

Mung Bean sprouts according to Livestrong:

Mung bean sprouts have a low calorie density, or energy density, with only 31 calories per 104 g serving. Low energy-dense foods can help you lose weight or prevent weight gain because they are relatively low in calories compared to their serving size, so you can fill up on them without eating too many calories, according to MayoClinic.com. Low energy-dense foods tend to be low in fat and high in dietary fiber, and mung bean sprouts have almost no fat and nearly 2 g dietary fiber per serving.

Each cup, or 104 g serving, of sprouted raw mung beans provides 155 mg potassium and only 6 mg sodium. Try to get at least 4,700 mg potassium and no more than 2,300 mg sodium per day to avoid high blood pressure and an increased risk for heart disease, stroke and kidney disease, according to the 2010 Dietary Guidelines from the U.S. Department of Health and Human Services.

Each 1-cup serving of raw mung bean sprouts provides 14 mg vitamin C, or nearly one quarter of the daily value for vitamin C. Vitamin C is an antioxidant vitamin that is essential for proper immune function and wound healing. Another benefit of mung bean sprouts is their 60 mcg folic acid, or 15 percent of the daily value for this B vitamin, which is an especially important nutrient for women who may become pregnant, because it reduces the risk for neural tube birth defects.

A benefit of mung bean sprouts is that more than 90 percent of their weight is water, and you can use them, like other vegetables, to help you stay hydrated, according to the University of Michigan. Mung bean sprouts are a cholesterol-free food, and their dietary fiber can lower levels of bad LDL cholesterol in your blood.


http://www.facebook.com/pages/Marys-Heirloom-Seeds/229833070442449

Sign up for our E-Newsletter


Wednesday, March 28, 2012

Using Seaweed in the Garden (part 2)

Part 1 of Using Seaweed in the Garden was posted back in July 2011.  I thought it would be nice to go into more detail about the Why and the How of using seaweed as a natural fertilizer (and more).

Seaweed has many uses but I'm going to talk about using seaweed for Fertilizer, Mulch, Pest Control and Compost Activator.

Fertilizer
Seaweed tea is simple and easy to make.  It can be stored up to 3 month but is best used within 4 weeks.  Seaweed contains trace elements and minerals and is a Nitrogen-rich soil amendment.  Use seaweed for those heavy feeders such as Tomatoes, Peppers and Squash.

Mulch
I use all types of organic material for mulch such as dry leaves, store-bought bark (mulch) and seaweed.  Once I have used up the last of my tea, the rest gets used as mulch around my tomatoes.  Mulch is important to keep down the weeds, retain moisture, protects close to the surface roots, all while providing nutrients to the plant as the mulch breaks down.

Pest Control
While using seaweed hasn't kept the neighborhood cats out of my garden, I have very little snails or slugs.  For natural pest control I also use companion planting for an all around happy garden (and happy bees).

Compost Activator
If you have a compost pile of bin, seaweed is your friend.  What is Compost? was also posted July 2011 and is a great starting point for new gardeners.  "Compost is a natural soil amendment and garden fertilizer.  It can be made FREE using kitchen scraps (and yard clipping)."  Add seaweed to the compost pile to add nutrients and speed the process by feeding the beneficial microbes.
As I mention in my original post, clean the seaweed before you apply to plants, tea or compost.  It's important when collecting seaweed that you observe you state and local laws.  There are many protected beaches that do not allow people to remove anything from the shore or water.  I collected my seaweed first thin in the morning so it was fresh and relatively clean.

Please be aware of tiny creatures.  Inspect the seaweed or rinse before you leave the shore so you don't bring home (and possibly kill) helpless creatures.

Texas Chili Recipe

Below is my version of Texas Chili.  Not sure what makes it "Texas," but it is yummy! 

To prepare to make this version of chili, I soak dry beans in a large pot for 24 hours.  I usually use 1 (16 ounce) bag of dry Chili Beans or Black Beans.  I cook the beans by themselves for several hours before I use this recipe.

Texas Chili

Ingredients:
2 pounds lean ground beef
1 large onion, chopped
1 large bell pepper, chopped
6 stalks of celery, thinly chopped
2 (28 ounce) cans diced tomatoes
4 (8 ounce) cans tomato sauce
3 jalapeno peppers, minced (optional)
1/2 cup chili powder
1 teaspoon crushed red pepper flakes
1 teaspoon ground black pepper
1/4 teaspoon garlic powder

16 ounce dry chili (or pinto) beans, cooked  
OR  3 (15 ounce) cans pinto beans

Directions:
Cook and stir the beef, onion, and bell pepper in a large pot over medium heat until the beef is brown and onion, celery and pepper are tender, about 10 minutes. Drain grease from beef.

Stir in beans, tomatoes, tomato sauce, jalapenos (if using), chili powder, red pepper flakes, black pepper, salt, and garlic powder. Bring mixture to a slow boil; cover and reduce heat. Simmer chili at least 30 minutes, stirring occasionally so that it does not stick.

This chili can be simmered for several hours; the longer you simmer, the more flavor you will get.

Monday, March 26, 2012

Healthy Rice Pudding Recipe

I was looking for a "healthy" version of rice pudding.  Initially all I found were recipes that substituted skim milk for whole milk or heavy cream.  Since my hubby and I completed our 21 day detox we have decided to severely limit our milk consumption. The recipe I finally settled on is vegan so no milk and no eggs (and LOW fat).

1 cup organic brown rice
1 1/2 cups water
1 Tbsp vegan butter
1 tsp salt
1 1/2 cup Vanilla Coconut Milk (or other non-dairy creamy beverage)
1/3 cup agave or maple syrup
1 tsp cinnamon
1/2 tsp vanilla extract
3 Tbsp unsweetened toasted coconut flakes, optional

First, add the rice, water, salt and butter to a pan. Bring it to a bowl over high heat. Cover with lid, reduce heat to low. Simmer rice for an additional 30 minutes, until liquid is absorbed.

Next, turn heat to medium and stirring constantly, add all the coconut milk until it has been sufficiently absorbed. Be sure to uncover lid so that steam can cook off the rice. Fold in the vanilla extract, cinnamon and agave or maple syrup. Cover with lid and allow to sit for ten minutes.

Serve warm or store in fridge to serve cold. Sprinkle a bit of cinnamon and a drizzle of agave syrup on top before serving.

Enjoy!

Friday, March 23, 2012

Backyard Beekeeping: Getting Started

Before you go out and buy fancy and expensive equipment it is best to do research.  There are hundreds (maybe thousands) of books and websites out there to help you get started out right.  Beekeeping isn't like baking a cake.  You can't just buy the ingredients, mix it together, bake and let cool.

I've ordered a few books to get me started and I'll start to review them in the next few weeks.  Below are a few which had great reviews.
I look forward to reading about the wonders of Beekeeping!


Tuesday, March 20, 2012

Peat Pellets Specials Extended! Happy Spring!

Have you purchased your Peat Pellets yet?  
I have been VERY pleased with the germination rates and ease of transplanting since I've been using Peat Pellets.  They are virtually mess-free!  I am so impressed that I've decided extend the special offer until MARCH 31st!

Mary's Heirloom Seeds will include 6 free Peat Pellets in all seed orders over $25 (plus FREE Priority Shipping).
Zinnias in Peat Pellets
Also available until March 31st, purchase 25 Peat Pellets and receive 5 EXTRA Peat Pellets AND a Free extra Seed Pack  
(plus FREE Shipping).
Thyme growing in Peat Pellets
 Growing Herbs in Peat Pellets is easy.  Just add water and sprinkle seeds over the top of the peat pellet.  Keep the pellet moist by adding water to the bottom of the tray or bowl to keep from scattering the tiny seeds.
Transplanted Squash seedling
Transplanting seedlings is simple with no root disturbance.  Simply place the seedling (in peat pellet) in the dirt and cover peat pellet completely.

Monday, March 19, 2012

Honeybee Deaths and Genetically Modified Crops

This article was originally published by Global Research in March 2008
Commercial beehives pollinate over a third of {North}America’s crops and that web of nourishment encompasses everything from fruits like peaches, apples, cherries, strawberries and more, to nuts like California almonds, 90 percent of which are helped along by the honeybees. Without this pollination, you could kiss those crops goodbye, to say nothing of the honey bees produce or the flowers they also fertilize’.1 

      This essay will discuss the arguments and seriousness pertaining to the massive deaths and the decline of Bee colonies in North America. As well, it will shed light on a worldwide hunger issue that will have an economical and ecological impact in the very near future. 

      There are many reasons given to the decline in Bees, but one argument that matters most is the use of Genetically Modified Organisms (GMO) and "Terminator Seeds" that are presently being endorsed by governments and forcefully utilized as our primary agricultural needs of survival. I will argue what is publicized and covered by the media is in actuality masking the real forces at work, namely the impact of genetically modified seeds on the reproduction of bee colonies across North America.

      Genetically modified seeds are produced and distributed by powerful biotech conglomerates. The latter manipulate government agricultural policy with a view to supporting their agenda of dominance in the agricultural industry. American conglomerates such as Monsanto, Pioneer Hybrid and others, have created seeds that reproduce only under certain conditions, often linked to the use of their own brands of fertilizer and/or insecticide.

The genetic modification of the plant leads to the concurrent genetic modification of the flower pollen. When the flower pollen becomes genetically modified or sterile, the bees will potentially go malnourished and die of illness due to the lack of nutrients and the interruption of the digestive capacity of what they feed on through the summer and over the winter hibernation process.

 You'll find the rest of the article here.

Saturday, March 17, 2012

Another Theory about Honeybee Deaths

I found another article this morning about Bee Deaths titled "Honeybee Death Linked to Corn Insecticide."  Today I will re-post the entire article.  There are many theories surrounding the major die-off of honeybee colonies or Colony Collapse Disorder (CCD).  I think researchers are on the right path. However, the article DOES NOT mention the statistics of GMO corn grown in the US.

Currently Commercialized GM Crops in the U.S.:
Soy (91%)
Cotton (88%)
Canola (80-85%)
Corn (85%)
Hawaiian papaya (more than 50%)

THIS is one of the MANY reasons to GROW YOUR OWN and plant heirloom seeds!

Honeybee Deaths Linked to Corn Insecticide:
What was killing all those honeybees in recent years?  New research shows a link between an increase in the death of bees and insecticides, specifically the chemicals used to coat corn seeds.

The study, titled "Assessment of the Environmental Exposure of Honeybees to Particulate Matter Containing Neonicotinoid Insecticides Coming from Corn Coated Seeds," was published in the American Chemical Society's Environmental Science & Technology journal, and provides insight into colony collapse disorder.
Colony collapse disorder, or the mass die-off of honeybees, has stumped researchers up to now. This new research may provide information that  could lead to even more answers.

According to the new study, neonicotinoid insecticides "are among the most widely used in the world, popular because they kill insects by paralyzing nerves but have lower toxicity for other animals."

Beekeepers immediately observed an increase in die-offs right around the time of corn planting using this particular kind of insecticide.

Pneumatic drilling machines suck the seeds in and spray them with the insecticide to create a coating before they are planted in the ground. Researchers suspected the mass die-offs could have been caused by the particles of insecticide that were released into the air by the machines when the chemicals are sprayed.
The researchers tested several methods to make the drilling machines safer for bees. However, they found that all variations that used the neonicotinoid insecticides continued to cause mass die-offs of bees.

Honeybees are critical for pollinating food crops. Scientists say the disruption of pollination could dramatically affect entire ecosystems. In addition, as the researchers wrote in the study, "In view of the currently increasing crop production, and also of corn as a renewable energy source, the correct use of these insecticides within sustainable agriculture is a cause of concern."

For more information on honeybee deaths, 
look Here, Here and Here.

Wednesday, March 14, 2012

Recipe for Delight: Focaccia

I feel a bit carb-obssessed lately.  I don't eat a whole lot of bread or pasta but when I do I really savor the flavors.  I stumbled across a delicious recipe for Focaccia the other day and I just have to share.

Easiest Focaccia
Ingredients
1 teaspoon white sugar
1 (.25 ounce) package active dry yeast
1/3 cup warm water (110 degrees F/45 degrees C)
2 cups all-purpose flour
2 tablespoons olive oil
1/4 teaspoon salt

Directions
In a small bowl, dissolve sugar and yeast in warm water. Let stand until creamy, about 10 minutes.

In a large bowl, combine the yeast mixture with flour; stir well to combine. Stir in additional water, 1 tablespoon at a time, until all of the flour is absorbed. When the dough has pulled together, turn it out onto a lightly floured surface and knead briefly for about 1 minute.

Lightly oil a large bowl, place the dough in the bowl and turn to coat with oil. Cover with a damp cloth and let rise in a warm place until doubled in volume, about 30 minutes.

Preheat oven to 475 degrees F (245 degrees C).

Deflate the dough and turn it out onto a lightly floured surface; knead briefly. Pat or roll the dough into a sheet and place on a lightly greased baking sheet. Brush the dough with oil and sprinkle with salt.

Bake focaccia in preheated oven for 10 to 20 minutes, depending on desired crispness. If you like it moist and fluffy, then you'll have to wait just about 10 minutes. If you like it crunchier and darker in the outside, you may have to wait 20 minutes.

This might be the easiest focaccia recipe ever. Seriously!

Monday, March 12, 2012

Garden Update: Peat Pellets and Seedlings

A week has gone by and most of the seeds I planted have germinated and are thriving.  I wasn't sure what to expect since I had never used Peat Pellets as a growing medium.  In the past I have purchase seed-starter soil and peat pots or the greenhouse disaster and hoped for the best.
Dry Peat Pellets (before)

I have had a MUCH better success rate using the Peat Pellets than ever before.  They have required much less water, less space and are mess free.  I love mess free!  They are most certainly "quick cheap and easy."
Fully grown Peat Pellets (after)

Since most of the seeds I planted in the mini greenhouse didn't do so well I planted quite a bit more seeds than I need (just in case) so I'm sure there will be extras left over for gifts.  I planted flowers, herbs and veggies again.
Radish Seedlings after 4 days

In a few weeks the seedlings will be ready for a more permanent home.  I've read that it might give the roots an advantage if I snip off the bio-degradable casing before transplanting.  I don't think I'll be snipping anything, just in case I disturb the delicate roots.
Baby Zinnias after 7 days
I wasn't sure how the squash would grow in the Peat Pellets.  I didn't soak the seeds for 24 hours like I normally do to prepare than for germination.  I am pleased to say that the squash and all of the new herbs are growing just fine!
Borage Seedlings
Last but certainly not least, the survivors from the greenhouse catastrophe are doing well.  I rescued all of the Dark Purple Opal Basil and I'm looking forward to Opal Basil Jelly.
Dark Purple Opal Basil seedling
From now until March 20th, Mary's Heirloom Seeds will include 6 free Peat Pellets in all seed orders over $25
(plus FREE Priority Shipping).


Also available until March 20th, purchase 25 Peat Pellets and receive 5 EXTRA Peat Pellets AND a free extra Seed Pack
(plus FREE Shipping).

Check out the video!
  Happy Planting!

Saturday, March 10, 2012

Guest Post: Tom in Florida

Today's post is from a fellow gardener, currently growing in South Florida (Zone 10).  I hope to have many more just like it from readers and fellow bloggers.  Are you a gardener or Urban Homesteader?  Not sure what an Urban Homesteader is but you bake, preserve food, raise chickens or goats, garden or enjoy DIY projects?  I'm looking for your input!

Sit back, relax and enjoy.  Or if you're like me, read in between the 6 projects you have going all at one time.
~~~~~~~~~~~~~~~~~~~~~~~~~~~~~~~~~~~~~~~~~~~~~~~~

I recall my mother taking some seeds from a cantelope and showing me how to plant them. We got our cantelopes, and I was hooked. I was perhaps seven or eight and since then I've have kept a vegetable garden almost every year. Because we were a military family, I've planted gardens in many climates and soil conditions, perhaps none more challenging than here in South Florida. Our first year here I went to buy tomato seedlings in June, and the woman told me I'd have a hard time with tomatoes in the summer. My first lesson in Zone 10. Now I do most of my vegetable growing starting in late fall and over the winter. I don't grow much in the summer except to keep herbs in pots on the shaded front porch through the warmest months.
Photo by Tom

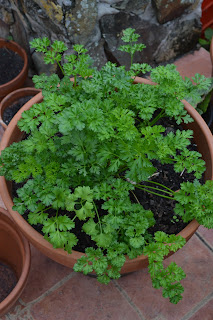
I'm growing my usual line-up now. Lots of tomatoes, both full and grape sized, bell peppers, jalapenos, Swiss chard, several types of parsley, chives, rosemary, basil, and cilantro. This year I'm doing more in pots than I typically do; just seems easier to control the variables this way. My large tomatoes seem a bit off, probably because I started very late -- January -- and because it's been so warm at night, but the grape tomatoes are doing especially well. No problems with the herbs.
Photo by Tom

I'm not sure I qualify as a true organic grower but I avoid all chemicals. For one, I typically use commercially grown seedlings. I try to beef up our sandy soil with grass clippings, cow manure compost, and sometimes a bit of commercial planting soil with no additives and place it directly in the hole when planting. For fertilizer, I use only fish emulsion and fight bugs and disease with a mixture of dish soap (unscented), vegetable oil, and baking soda ( 1 tsp of each in a quart of water). I've used neem oil from time to time but find the homemade mixture to work very well.
Photo by Tom

I avoid the chemical solution to pests because I worry about eventually eating the traces that might be left behind in the food.  Because our water table is so shallow, and because our kids played in the yard when they were children, I also long ago abandoned chemicals to keep my lawn "healthy" As a result, I don't have a lawn so much as a reasonably decent looking carpet of weeds of every type. But when it's mowed, it looks from a short distance like a lawn, lol. The weed lawn also doesn't require watering and the many seeds from the weeds attract lots of birds.
Photo by Tom

If you are interested in posting what you're doing in the garden, what works for you or just a few pictures, please email   mari_backtonature@yahoo.com

If you like this post and would like to see more like it, let us know!

To receive up-to-date posts and information, "follow by email"  or "like" Mary's Heirloom Seeds on Facebook.
~~~~~~~~~~~~~~~~~~~~~~~~~~~~~~~~~~~~~~~~~~~~~~~~

Friday, March 9, 2012

Growing Eggplant from Seed

I mentioned back in February that I had trouble with my first Eggplants.  I was unaware that the blooms would not produce fruit when it was too hot.  I'm still learning A LOT about gardening!

Eggplants can grow 2 to 6 feet tall, depending on the variety.  Grow eggplant in full sun. Eggplant is not particular about the soil it grows in but will grow best in well-drained soil rich in organic matter.

Eggplant is sensitive to cold (and extreme heat). It grows best where day temperatures are between 80° and 90°F and night temperatures between 70° and 80°F. Eggplant is best started indoors 6 to 8 weeks before transplanting into the garden.

Sow eggplant seed ¼ to ½ inch deep spaced 4 to 5 inches apart. Thin plants to 6 inches apart if the weather does not allow transplanting before plants grow 5 to 6 inches tall. Set eggplants into the garden 18 to 24 inches apart. Space rows 24 to 36 inches apart.

Do not over water or allow the soil to dry out. Once the soil has warmed, mulch around eggplants to retain soil moisture and an even growing temperature. Eggplants are heavy feeders prepare planting beds with aged compost and side dress eggplants with compost tea every 2 or 3 weeks during until the fruit has set. (stay tuned for compost tea recipe)

Eggplant is easily grown in containers. Plants will grow in pots at least 12 inches across and as deep. Choose a smaller growing variety.

I like to prepare eggplant by slicing thin rounds, grilling lightly on either side, drizzled with olive oil and a dash of salt and pepper.  It's SO EASY!!

Thursday, March 8, 2012

Growing Cauliflower from Seed

 Although the Cauliflower is part of the Cabbage family, Cauliflower usually require more attention.  Cauliflower takes up quite a bit of space in the garden.

Cauliflowers are a cool weather crop. Hot temperatures can reduce head development. In summer you can cover the head with the plants leaves.

When growing Cauliflower, the soil should be prepared well in advance, especially if you are enriching the soil with organic matter. If you are sowing the cabbage seeds in spring, prepare the soil in autumn by digging in plenty of well-rotted compost or manure.  The soil should have been dug deep. Cauliflower grows well in loamy, well drained soils.

Sow the seeds at ½ inch deep.  About 6 weeks after sowing the seedlings they should be ready to harden off before planting out. Harden the seedlings off a week before planting out by gradually increasing the amount of time the plants are left outside and the amount of sun the plants receive.

Tuesday, March 6, 2012

Growing Cabbage from Seed

Cabbage is best grown in a temperate climate, and should be planted in an open and sunny spot that can either be in full sun or partial shade.

Most types of cabbage require a well-draining, light - medium soil with a neutral pH of about 6.5 - 7.0.

When growing cabbage, the soil should be prepared well in advance, especially if you are enriching the soil with organic matter. If you are sowing the cabbage seeds in spring, prepare the soil in autumn by digging in plenty of well-rotted compost or manure.

Sow the seeds at ½ inch deep.  If you are direct sowing, leave 6 inches between rows. When seedlings reach a height 4 - 6 inches and have 5 or 6 true leaves, they will be ready to transplant.

It is best to water in the evening, the day before you are due to transplant, and then plant the seedlings 12-18 inches apart for spring cabbage. Allow approximately 1 foot between rows. Make sure that you firm down the soil around the plants.

Hoe around the plants to remove all weeds and apply a mulch to suppress weeds from appearing. Mulch will also retain moisture, which is extremely important during the hot weather. The cabbage plants must not be allowed to dry out, as it will affect their growth.

Harvesting Cabbage is easy.  Simply lift the whole vegetable from the ground with a garden fork or spade, or cut the stem, just above the lowest leaves of the plant.
"Chinese cabbage, often called Chinese leaves in supermarkets are the odd one out in the cabbage family. They look more like a cos lettuce than a cabbage for starters.
The cultivation method is completely different than conventional cabbage as well, they do not like root disturbance and usually would be sown in situ rather than being transplanted.

Cultivation of Chinese Cabbage
Like the other brassicas they like a rich soil with a high pH - neutral at least..
Sow about 3 or 4 seeds at 30cm spacing each way, usually in May although some fast growing varieties can go in as late as early August and thin to the strongest seedling. Harvest is from late September to min-November."

Cabbage is full of vitamins and minerals including vitamins A, B, C and K as well as iron, potassium, magnesium, calcium, phosphorous and manganese.  Looking for a recipe for all your delicious cabbage?  Check out Cabbage and Broccoli Slaw with Brussels Sprouts and Radishes, with Creamy Dijon Dressing

Monday, March 5, 2012

DIY Cream Cheese Recipe

I found a wonderful recipe for Live-Cultured Cream Cheese over at Little City Farm.  If I ever get back to eating dairy again (now that I'm finished with the detox)  I'll be making this little gem for sure! 

Live Cultured Cream Cheese 

You will need:
2 cups live cultured yogurt
several layers of cheesecloth and one elastic band
wooden stick (e.g. a chopstick)
large pitcher or measuring cup


1) Pour the yogurt through the cheesecloth, into the large pitcher/measuring cup.  Secure the cheesecloth with the elastic band to hold it in place while the whey from the yogurt continues to drip through.

2) After about 2 hours (or when the yogurt stops dripping), wrap the cheesecloth tightly around the "ball" of yogurt and secure with elastic.  Hang this from the chopstick over top of the pitcher. 

3) After 24 hours you will have nice firm live cultured cream cheese that you can scrape out of the cheesecloth, plus about a cup of whey in your pitcher.  Use the whey in smoothies, baking, etc.

This would be great on homemade whole wheat bread!

Sunday, March 4, 2012

Whole Wheat Bread

My hubby and I are DONE with the 21-day purification program and we're looking forward to integrating a few items back into our diets.  Homemade bread is one of those delicious foods I have missed. 

When I'm in a hurry and I don't have time to really search for a recipe I typically use allrecipes.com.  I normally choose a very simple recipe for the ingredients I'd like to prepare and then amend to my (or my hubby's) liking.

Whole Wheat Bread 

Ingredients
3 cups warm water (110 degrees F/45 degrees C)
2 (.25 ounce) packages active dry yeast
1/3 cup honey
5 cups bread flour
3 tablespoons butter, melted
1/3 cup honey
1 tablespoon salt
3 1/2 cups whole wheat flour
2 tablespoons butter, melted

Directions
In a large bowl, mix warm water, yeast, and 1/3 cup honey. Add 5 cups white bread flour, and stir to combine. Let set for 30 minutes, or until big and bubbly.

Mix in 3 tablespoons melted butter, 1/3 cup honey, and salt. Stir in 2 cups whole wheat flour. Flour a flat surface and knead with whole wheat flour until not real sticky - just pulling away from the counter, but still sticky to touch. This may take an additional 2 to 4 cups of whole wheat flour. Place in a greased bowl, turning once to coat the surface of the dough. Cover with a dishtowel (or a large glass bowl). Let rise in a warm place until doubled.

Punch down, and divide into 3 loaves. Place in greased 9 x 5 inch loaf pans, and allow to rise until dough has topped the pans by one inch.

Bake at 350 degrees F (175 degrees C) for 25 to 30 minutes; do not overbake.

Lightly brush the tops of loaves with 2 tablespoons melted butter or margarine when done to prevent crust from getting hard. Cool completely

Friday, March 2, 2012

Friday Garden Update

Small Black Beauty Eggplant
Today is show and tell!  I'm so excited to share my baby Black Beauty Eggplants.  I'm almost embarrassed to admit that these stubborn plants have been growing in the garden for ALMOST A YEAR!  I didn't research Eggplants enough when I first planted them.  I didn't know that they will not bear fruit when it is too hot.
HELLO...I live in South Florida!
Bloom with Ladybug
The Bee-Friendly flowers I planted a few weeks ago are out and standing tall.

Marigolds
Cosmos
And now for the rest of the garden tour!
Red Potatoes
More Tomatoes!!!
Pimiento Peppers
Purple Top Whiteglobe Turnips
African Daisy

Have a Great Weekend!
HAPPY PLANTING!!!

Thursday, March 1, 2012

Seed-Starting Made Easy

There is a new product available at Mary's Heirloom Seeds called Jiffy 7 Peat Pellet.  A Peat Pellet is a small disc, containing weed-free professional grade Canadian Sphagnum peat.  
Pellet size:  42mm x 7mm (1.65” x  .28”)

Add water, and the Peat Pellet quickly swells to 7x its original size to become a perfect self contained pot with its own perfect medium for starting seeds.
The peat is held together by a biodegradable mesh net and can be transplanted with the seedling when roots push through the netting.  Peat Pellets are so easy to use, they make seed-starting simple and mess-free!  

From now until March 20th, Mary's Heirloom Seeds will include 6 free Peat Pellets in all seed orders over $25 
(plus FREE Priority Shipping).

Also available until March 20th, purchase 25 Peat Pellets and receive 5 EXTRA Peat Pellets AND a free extra Seed Pack 
(plus FREE Shipping).


Happy Planting!