A few months ago my new seeds arrived and so I updated the website. This weekend I planted a few seeds to get ready for next year. I'm a few weeks ahead of schedule but what the heck, I'm going to plant a few seeds every weekend.
On Saturday I planted German Giant Radishes. I tried this variety earlier this year but it was too hot. I also planted Red Burgundy Onions and more Little Gem Lettuce. Unfortunately, due to unforeseen issues a few of my previous lettuce plants were destroyed.
On Sunday I planted Bulgarian Giant Leeks, Purple Top Whiteglobe Turnips and Table Queen Bush Squash. I don't dare post a picture of the current state of my covered patio. When I see little sprouts I'll share but not yet.
If you don't live on sunny South Florida (or even if you do) and would like to know what to plant for your area and when to plant it send me an email or post a comment. I'm happy to point you in the right direction.
Happy Planting!
Sunday, December 11, 2011


Saturday, December 10, 2011
Dinner: Slow-Cooker Chicken and Spanish Rice
Dinner for tonight has been cooking for a few hours already. I have made chicken this way so many times but I have never used a specific recipe so here goes:
Time: 4 hours
Ingredients:
8 chicken breasts
6-8 cups water (enough to cover all ingredients)
1/2 red onion, chopped
2 jalapenos, chopped
1 can stewed tomatoes or tomato sauce (even pasta sauce in a pinch)
1 bunch cilantro, whole pieces or chopped
Directions:
Place chicken in the slow cooker and cover with onion, jalapeno, tomatoes and cilantro. Add enough water to cover all ingredients. Turn slow cooker on high for the first 3 hours, turn to low for the remaining hour.
Done!
This recipe is great for taco filling, sandwiches or with rice and/ or beans.
Slow-Cooker Chicken
Servings: 6-8Time: 4 hours
Ingredients:
8 chicken breasts
6-8 cups water (enough to cover all ingredients)
1/2 red onion, chopped
2 jalapenos, chopped
1 can stewed tomatoes or tomato sauce (even pasta sauce in a pinch)
1 bunch cilantro, whole pieces or chopped
Directions:
Place chicken in the slow cooker and cover with onion, jalapeno, tomatoes and cilantro. Add enough water to cover all ingredients. Turn slow cooker on high for the first 3 hours, turn to low for the remaining hour.
Done!
This recipe is great for taco filling, sandwiches or with rice and/ or beans.
Spanish Rice:
Servings: 8
Ingredients:
1 (15 ounce) can stewed tomatoes
1 1/2 cups chicken stock
1 1/4 cups rice
2 teaspoons chili powder
3/4 teaspoon oregano
1/2 teaspoon garlic salt
1 teaspoon cumin
Directions:
In medium saucepan, combine all ingredients (I usually mash tomatoes with potato masher or give them a quick spin in food processor).
Bring to a boil; reduce heat to low.
Cover and simmer 25 minutes or until rice is done. (Unless you like sticky, gooey rice, don't take off the lid and stir at all until it is done).
Garnish with green onions and/or cheddar cheese.
Thursday, December 8, 2011
Compost! Take 2...
I am re-posting from July because my tomatoes are growing bigger than I could have possibly imagined thanks to a bit of aged compost. The best part...It was FREE!!! Since Christmas is right around the corner and I'll be cooking like a madwomen, I'll also be adding most of my kitchen "waste" to my brewing compost bin.
What is Compost?
Compost is a natural soil amendment and garden fertilizer. It can be made FREE using kitchen scraps. Apple cores, banana peels, celery or carrots parts, rinds and peels from fruits and veggies...throw it all in there! But don't stop there- also use grass clipping, dead leaves and other yard waste.
Not only does composting save money on expensive fertilizers and soil amendments, it keeps all of this "trash" out of your garbage bin and out of landfills.
Using compost improves soil structure, texture, and aeration and increases the soil’s water-holding capacity.
Warning: Everything I read about compost says not to use meat, diary or pet waste in your compost.
Do I need to buy a fancy (expensive) composter? No way!
In my own yard I have a big (dark) plastic tub which I drilled holes into the bottom. I've added my kitchen and yard "waste" and then a layer of soil...repeat! Every 4 or 5 days I go out into the yard and turn it over. No, I don't dump it out, "turn it" is garden-speak for stir or mix. The more I "turn" the mix the faster it seems to decompose.
What's in My Compost Bin?
Cherry stems, apple cores, lime rinds, coffee grounds, tea bags, celery leaves, potato peels, carrot ends, cucumber and onion bits, egg shells (washed and dried), grass clippings, dead leaves, dead flowers, mango skins. I might have forgotten a few things but you get the picture.
Stay away from using lawn clippings or additives with chemical fertilizers or pesticides!
Nitrogen, potassium, and phosphorus are produced naturally by the feeding of microorganisms and decomposing waste. These three ingredients are essential for a thriving veggie garden.
Happy Planting!
What is Compost?
Compost is a natural soil amendment and garden fertilizer. It can be made FREE using kitchen scraps. Apple cores, banana peels, celery or carrots parts, rinds and peels from fruits and veggies...throw it all in there! But don't stop there- also use grass clipping, dead leaves and other yard waste.
Not only does composting save money on expensive fertilizers and soil amendments, it keeps all of this "trash" out of your garbage bin and out of landfills.
Using compost improves soil structure, texture, and aeration and increases the soil’s water-holding capacity.
Warning: Everything I read about compost says not to use meat, diary or pet waste in your compost.
Do I need to buy a fancy (expensive) composter? No way!
In my own yard I have a big (dark) plastic tub which I drilled holes into the bottom. I've added my kitchen and yard "waste" and then a layer of soil...repeat! Every 4 or 5 days I go out into the yard and turn it over. No, I don't dump it out, "turn it" is garden-speak for stir or mix. The more I "turn" the mix the faster it seems to decompose.
What's in My Compost Bin?
Cherry stems, apple cores, lime rinds, coffee grounds, tea bags, celery leaves, potato peels, carrot ends, cucumber and onion bits, egg shells (washed and dried), grass clippings, dead leaves, dead flowers, mango skins. I might have forgotten a few things but you get the picture.
Stay away from using lawn clippings or additives with chemical fertilizers or pesticides!
Nitrogen, potassium, and phosphorus are produced naturally by the feeding of microorganisms and decomposing waste. These three ingredients are essential for a thriving veggie garden.
Happy Planting!
Wednesday, December 7, 2011
Eggless Birthday Cookies
I found a recipe last night more out of desperation than curiosity. I've been a bit distracted lately and even with a trip to the supermarket I was out of eggs. It seems I just forgot.

It's my hubby's birthday so he got to choose what I made for dinner last night. He chose the easiest dinner (in my opinion) that I have prepared so I have made it a bunch of times. For dinner we had Chicken Tacos with cilantro, mixed greens, onions, jalapenos, sour cream, salsa and cheese. But dessert was a secret (and eggless).
I had planned on making Coconut Chocolate Chip Cookies but without eggs I had to find another recipe. The eggless recipe was perfect because oatmeal raisin cookies are his second favorite cookie.
Eggless Oatmeal Coconut Cookies
Ingredients:
1 cup All Purpose Flour
1/2 teaspoon Baking Soda
1/8 teaspoon Salt
1 cup Shredded Coconut (I used sweetened)
1 cup Quick Cooking Oats (I used large flake)
1/2 cup Butter
3/4 cup Granulated Sugar
2 tablespoons Honey
Directions:
1. Preheat the oven to 350F for 15 minutes. Butter two cookie sheets. Usually cookies baked on such dark coated sheets turn brown very quickly, so I lined it with parchment paper and then greased it with cooking spray.
2. In a large bowl sift together the flour, baking soda and salt. Stir in the coconut and oats.
3. Melt the butter with the sugar and honey in a small saucepan over medium heat. Remove it from the stove and let it cool for 2 minutes.
4. Pour the melted butter mixture to the dry ingredients and mix well with a spatula.
5. Add in chocolate chips.
6. Roll into balls the size of walnuts and place 1 inch apart on the baking sheet and flatten it slightly with a fork.
7. Bake for 15 minutes, or until golden brown. If using 2 cookie sheets, shift racks halfway through the baking to ensure even browning.
8. Let the cookies cool on the sheets until they firm slightly. Then using a spatula carefully lift the cookies and transfer it to a cooling rack to cool completely.
***My tweaks to the recipe***
Omit Honey
Replace butter with unsweetened apple sauce (do not heat on the stove)
Add 1 cup semi-sweet chocolate chips

Enjoy!
Monday, December 5, 2011
Garden Update. Harvesting!
I took a few pictures Sunday after I harvested Lettuce and Huckleberries.


Below are pictures I took bright and early this morning.
The seeds I planted a few weeks ago are now thriving seedlings.
On Saturday I transplanted most of the seedlings.
The Side Yard Project: (from the back-side)


Below are pictures I took bright and early this morning.
The seeds I planted a few weeks ago are now thriving seedlings.
On Saturday I transplanted most of the seedlings.
 |
| Transplants |
 |
| Hungarian Heart Tomatoes |
 |
| My very first Cherokee Purple Tomato |
 |
| Black Beauty Eggplant |
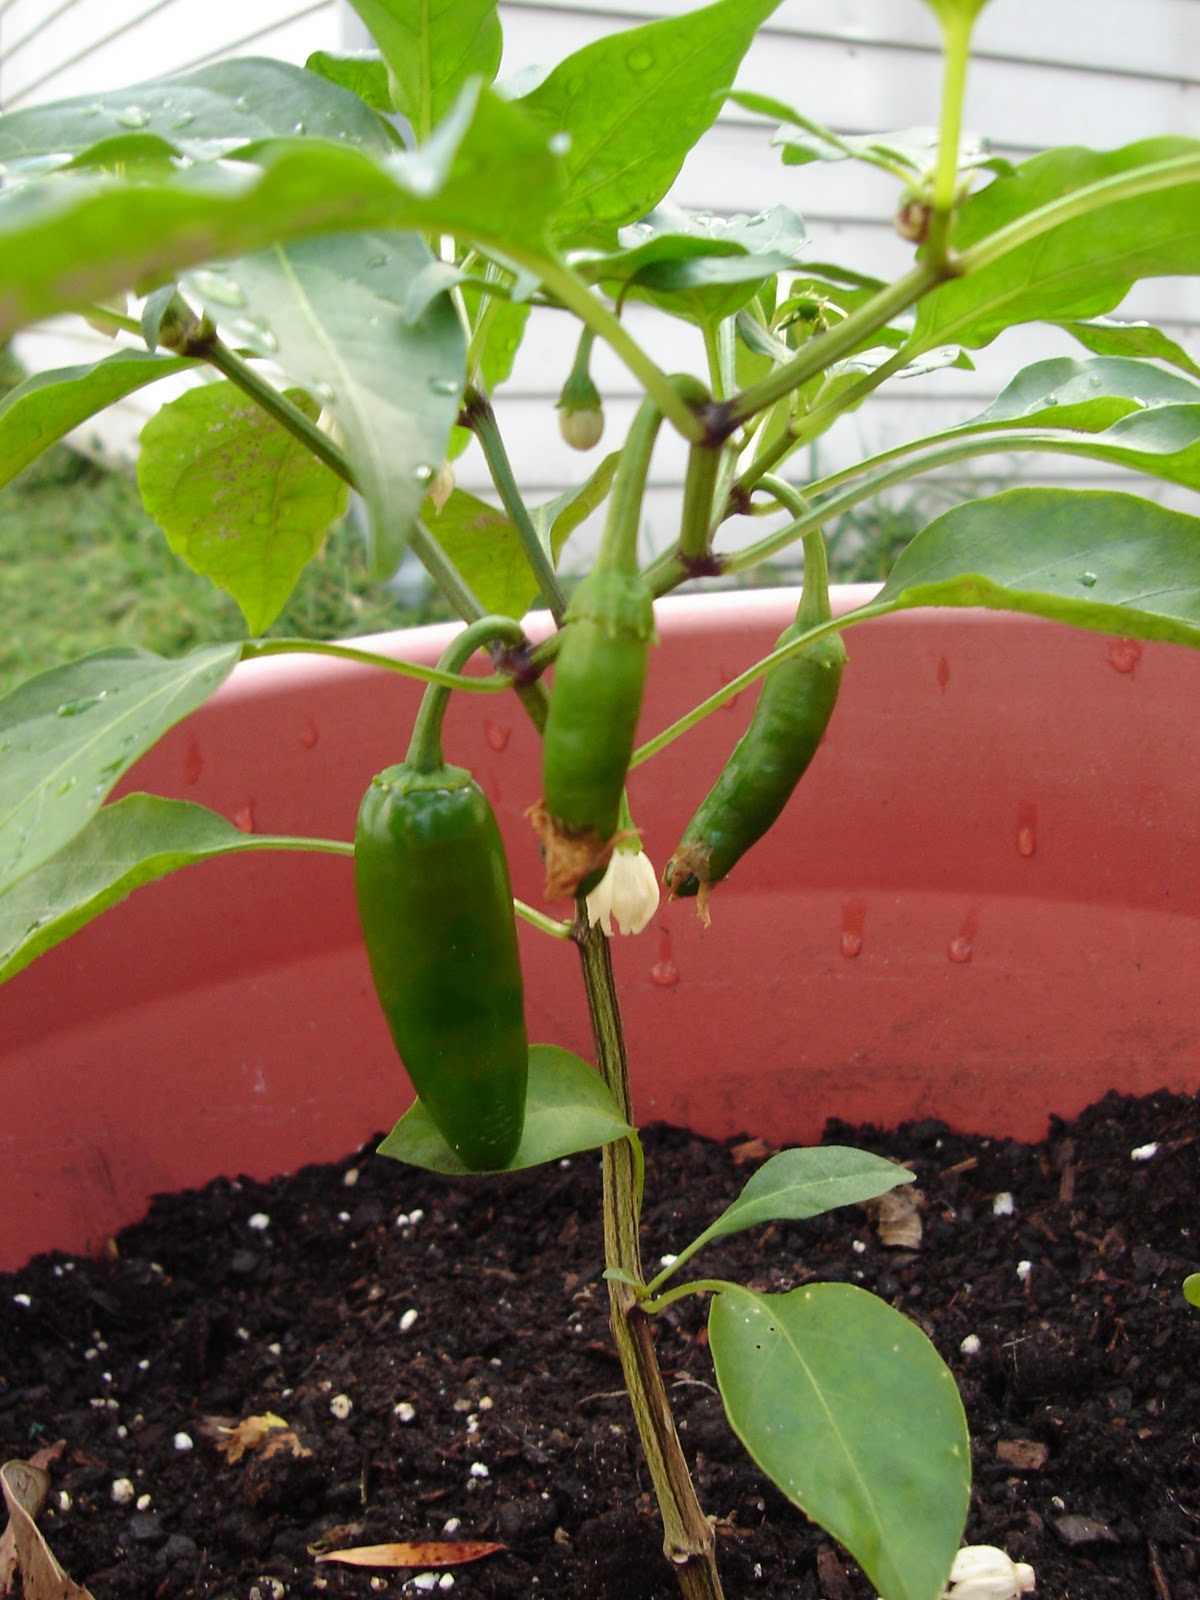 |
| Tam Jalapeno |

Happy Planting!
Saturday, December 3, 2011
Cookies Make Great Gifts
COOKIE RECIPE!!!!!!
Peanut Butter Chocolate Cookies
Ingredients
1 cup Ghirardelli Semi-Sweet Chocolate Chips
1/2 cup butter, softened
1/2 cup creamy peanut butter
1/2 cup packed brown sugar
1/4 cup sugar
1 egg
1 tablespoon milk
1 teaspoon vanilla
1 cup unsifted flour
1/2 teaspoon baking powder
1/2 teaspoon salt (optional)
3/4 cup dry-roasted, unsalted peanuts, chopped
Directions
Preheat the oven to 350 degrees F. In a large mixing bowl, cream the butter, peanut butter, brown sugar, and sugar until well blended. Beat in the egg, milk, and vanilla. In a separate bowl, combine the flour, baking powder, and salt. Gradually add the dry ingredients to the creamed mixture. Stir in the chocolate chips and peanuts. Chill the dough in the refrigerator for 15 minutes. Drop heaping tablespoons of dough onto an ungreased cookie sheet.
Bake 12 to 14 minutes, or until the edges are golden brown. Cool 1 minute on cookie sheet, then transfer to wire cooling racks. Store tightly covered.
Friday, December 2, 2011
On My Mind...

Grandma Demme
December 15, 1942-November 10, 2010.
She loved the outdoors. Grandma Demme was a creative and adventurous, free-spirit.
This is a Friday photo feature that anyone with a blog can join. To take part, post a photo on your own blog, write a short caption explaining it, and link it back to here from your blog by saying you're part of "On my mind". Please write a new post, don't link to an older one. When you've done that, come back here and add a comment below, with a link to your blog.
Thursday, December 1, 2011
DIY Soap Recipe
Soap-Making can be an involved process requiring special tools and ingredients. I like to keep it simple.
I have used several methods for making soap. The first time I made soap I purchased melt and pour soap as a base.
1. Chop up M&P soap
2. Melt in a double boiler (or microwave)
3. Add essential oils
4. Pour into prepared mold
5. Refrigerate
After a few hours in the fridge, or overnight on a counter, the soap is ready to be released and packaged.
Another option for making soap is using ready-made soap such as Ivory or Dr. Bronner's bar soaps.
Supplies:
1/4 cup Water
Dried and pulverized Herbs
Essential Oil
Approx 2 cups shredded bar soap
Double boiler or Large glass bowl
**It is not necessary to use both herbs and essential oils.
1. Pour boiling water over herbs.
2. Add 5 or 6 drops of essential oil.
3. Bring to a boil, stirring regularly.
4. Remove from heat and add shredded soap.
5. Mix well and let stand for 15 minutes.
6. Divide the mixture into several small balls or pour into prepared molds.
7. After a few hours in the fridge, or overnight on a counter, the soap is ready to be released and packaged.
There are recipes all over the internet for both Melt and Pour or Made from Scratch soaps. Happy Soaping!
I have used several methods for making soap. The first time I made soap I purchased melt and pour soap as a base.
1. Chop up M&P soap
2. Melt in a double boiler (or microwave)
3. Add essential oils
4. Pour into prepared mold
5. Refrigerate
After a few hours in the fridge, or overnight on a counter, the soap is ready to be released and packaged.
Another option for making soap is using ready-made soap such as Ivory or Dr. Bronner's bar soaps.
Supplies:
1/4 cup Water
Dried and pulverized Herbs
Essential Oil
Approx 2 cups shredded bar soap
Double boiler or Large glass bowl
**It is not necessary to use both herbs and essential oils.
1. Pour boiling water over herbs.
2. Add 5 or 6 drops of essential oil.
3. Bring to a boil, stirring regularly.
4. Remove from heat and add shredded soap.
5. Mix well and let stand for 15 minutes.
6. Divide the mixture into several small balls or pour into prepared molds.
7. After a few hours in the fridge, or overnight on a counter, the soap is ready to be released and packaged.
There are recipes all over the internet for both Melt and Pour or Made from Scratch soaps. Happy Soaping!
Subscribe to:
Posts (Atom)