Saturday, March 10, 2012

Guest Post: Tom in Florida

Today's post is from a fellow gardener, currently growing in South Florida (Zone 10).  I hope to have many more just like it from readers and fellow bloggers.  Are you a gardener or Urban Homesteader?  Not sure what an Urban Homesteader is but you bake, preserve food, raise chickens or goats, garden or enjoy DIY projects?  I'm looking for your input!

Sit back, relax and enjoy.  Or if you're like me, read in between the 6 projects you have going all at one time.
~~~~~~~~~~~~~~~~~~~~~~~~~~~~~~~~~~~~~~~~~~~~~~~~

I recall my mother taking some seeds from a cantelope and showing me how to plant them. We got our cantelopes, and I was hooked. I was perhaps seven or eight and since then I've have kept a vegetable garden almost every year. Because we were a military family, I've planted gardens in many climates and soil conditions, perhaps none more challenging than here in South Florida. Our first year here I went to buy tomato seedlings in June, and the woman told me I'd have a hard time with tomatoes in the summer. My first lesson in Zone 10. Now I do most of my vegetable growing starting in late fall and over the winter. I don't grow much in the summer except to keep herbs in pots on the shaded front porch through the warmest months.
Photo by Tom

I'm growing my usual line-up now. Lots of tomatoes, both full and grape sized, bell peppers, jalapenos, Swiss chard, several types of parsley, chives, rosemary, basil, and cilantro. This year I'm doing more in pots than I typically do; just seems easier to control the variables this way. My large tomatoes seem a bit off, probably because I started very late -- January -- and because it's been so warm at night, but the grape tomatoes are doing especially well. No problems with the herbs.
Photo by Tom

I'm not sure I qualify as a true organic grower but I avoid all chemicals. For one, I typically use commercially grown seedlings. I try to beef up our sandy soil with grass clippings, cow manure compost, and sometimes a bit of commercial planting soil with no additives and place it directly in the hole when planting. For fertilizer, I use only fish emulsion and fight bugs and disease with a mixture of dish soap (unscented), vegetable oil, and baking soda ( 1 tsp of each in a quart of water). I've used neem oil from time to time but find the homemade mixture to work very well.
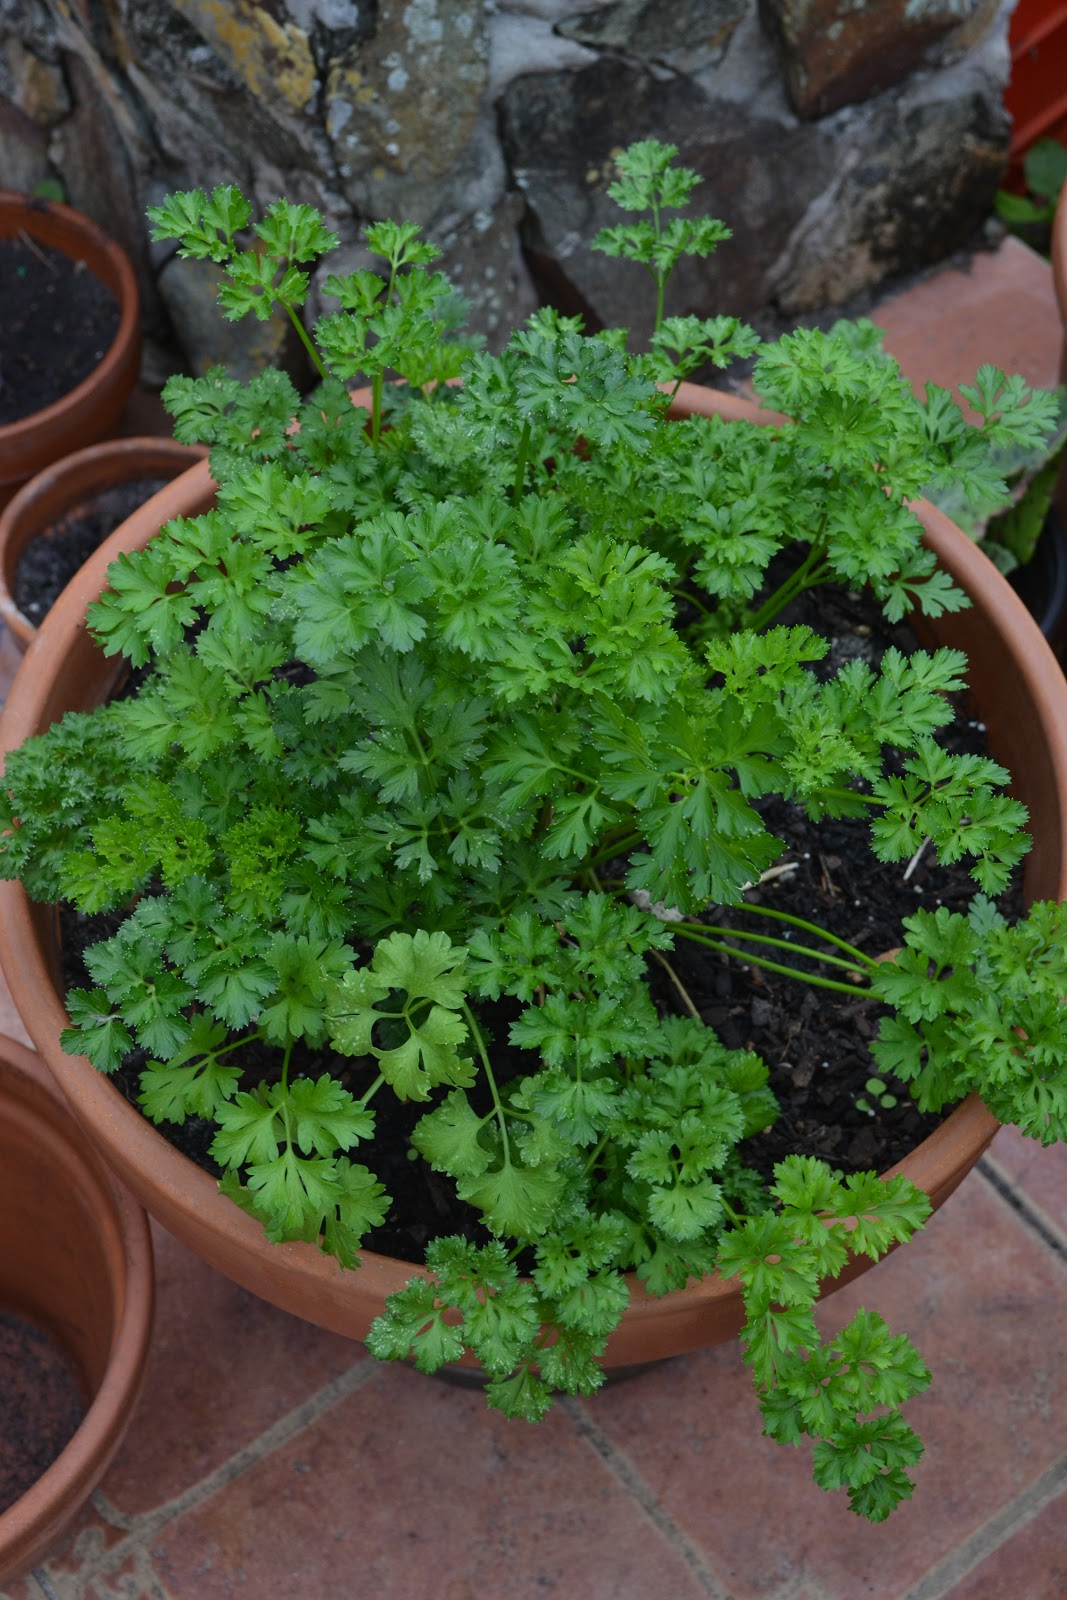
Photo by Tom

I avoid the chemical solution to pests because I worry about eventually eating the traces that might be left behind in the food.  Because our water table is so shallow, and because our kids played in the yard when they were children, I also long ago abandoned chemicals to keep my lawn "healthy" As a result, I don't have a lawn so much as a reasonably decent looking carpet of weeds of every type. But when it's mowed, it looks from a short distance like a lawn, lol. The weed lawn also doesn't require watering and the many seeds from the weeds attract lots of birds.
Photo by Tom

If you are interested in posting what you're doing in the garden, what works for you or just a few pictures, please email   mari_backtonature@yahoo.com

If you like this post and would like to see more like it, let us know!

To receive up-to-date posts and information, "follow by email"  or "like" Mary's Heirloom Seeds on Facebook.
~~~~~~~~~~~~~~~~~~~~~~~~~~~~~~~~~~~~~~~~~~~~~~~~

Friday, March 9, 2012

Growing Eggplant from Seed

I mentioned back in February that I had trouble with my first Eggplants.  I was unaware that the blooms would not produce fruit when it was too hot.  I'm still learning A LOT about gardening!

Eggplants can grow 2 to 6 feet tall, depending on the variety.  Grow eggplant in full sun. Eggplant is not particular about the soil it grows in but will grow best in well-drained soil rich in organic matter.

Eggplant is sensitive to cold (and extreme heat). It grows best where day temperatures are between 80° and 90°F and night temperatures between 70° and 80°F. Eggplant is best started indoors 6 to 8 weeks before transplanting into the garden.

Sow eggplant seed ¼ to ½ inch deep spaced 4 to 5 inches apart. Thin plants to 6 inches apart if the weather does not allow transplanting before plants grow 5 to 6 inches tall. Set eggplants into the garden 18 to 24 inches apart. Space rows 24 to 36 inches apart.

Do not over water or allow the soil to dry out. Once the soil has warmed, mulch around eggplants to retain soil moisture and an even growing temperature. Eggplants are heavy feeders prepare planting beds with aged compost and side dress eggplants with compost tea every 2 or 3 weeks during until the fruit has set. (stay tuned for compost tea recipe)

Eggplant is easily grown in containers. Plants will grow in pots at least 12 inches across and as deep. Choose a smaller growing variety.

I like to prepare eggplant by slicing thin rounds, grilling lightly on either side, drizzled with olive oil and a dash of salt and pepper.  It's SO EASY!!

Thursday, March 8, 2012

Growing Cauliflower from Seed

 Although the Cauliflower is part of the Cabbage family, Cauliflower usually require more attention.  Cauliflower takes up quite a bit of space in the garden.

Cauliflowers are a cool weather crop. Hot temperatures can reduce head development. In summer you can cover the head with the plants leaves.

When growing Cauliflower, the soil should be prepared well in advance, especially if you are enriching the soil with organic matter. If you are sowing the cabbage seeds in spring, prepare the soil in autumn by digging in plenty of well-rotted compost or manure.  The soil should have been dug deep. Cauliflower grows well in loamy, well drained soils.

Sow the seeds at ½ inch deep.  About 6 weeks after sowing the seedlings they should be ready to harden off before planting out. Harden the seedlings off a week before planting out by gradually increasing the amount of time the plants are left outside and the amount of sun the plants receive.

Tuesday, March 6, 2012

Growing Cabbage from Seed

Cabbage is best grown in a temperate climate, and should be planted in an open and sunny spot that can either be in full sun or partial shade.

Most types of cabbage require a well-draining, light - medium soil with a neutral pH of about 6.5 - 7.0.

When growing cabbage, the soil should be prepared well in advance, especially if you are enriching the soil with organic matter. If you are sowing the cabbage seeds in spring, prepare the soil in autumn by digging in plenty of well-rotted compost or manure.

Sow the seeds at ½ inch deep.  If you are direct sowing, leave 6 inches between rows. When seedlings reach a height 4 - 6 inches and have 5 or 6 true leaves, they will be ready to transplant.

It is best to water in the evening, the day before you are due to transplant, and then plant the seedlings 12-18 inches apart for spring cabbage. Allow approximately 1 foot between rows. Make sure that you firm down the soil around the plants.

Hoe around the plants to remove all weeds and apply a mulch to suppress weeds from appearing. Mulch will also retain moisture, which is extremely important during the hot weather. The cabbage plants must not be allowed to dry out, as it will affect their growth.

Harvesting Cabbage is easy.  Simply lift the whole vegetable from the ground with a garden fork or spade, or cut the stem, just above the lowest leaves of the plant.
"Chinese cabbage, often called Chinese leaves in supermarkets are the odd one out in the cabbage family. They look more like a cos lettuce than a cabbage for starters.
The cultivation method is completely different than conventional cabbage as well, they do not like root disturbance and usually would be sown in situ rather than being transplanted.

Cultivation of Chinese Cabbage
Like the other brassicas they like a rich soil with a high pH - neutral at least..
Sow about 3 or 4 seeds at 30cm spacing each way, usually in May although some fast growing varieties can go in as late as early August and thin to the strongest seedling. Harvest is from late September to min-November."

Cabbage is full of vitamins and minerals including vitamins A, B, C and K as well as iron, potassium, magnesium, calcium, phosphorous and manganese.  Looking for a recipe for all your delicious cabbage?  Check out Cabbage and Broccoli Slaw with Brussels Sprouts and Radishes, with Creamy Dijon Dressing

Monday, March 5, 2012

DIY Cream Cheese Recipe

I found a wonderful recipe for Live-Cultured Cream Cheese over at Little City Farm.  If I ever get back to eating dairy again (now that I'm finished with the detox)  I'll be making this little gem for sure! 

Live Cultured Cream Cheese 

You will need:
2 cups live cultured yogurt
several layers of cheesecloth and one elastic band
wooden stick (e.g. a chopstick)
large pitcher or measuring cup


1) Pour the yogurt through the cheesecloth, into the large pitcher/measuring cup.  Secure the cheesecloth with the elastic band to hold it in place while the whey from the yogurt continues to drip through.

2) After about 2 hours (or when the yogurt stops dripping), wrap the cheesecloth tightly around the "ball" of yogurt and secure with elastic.  Hang this from the chopstick over top of the pitcher. 

3) After 24 hours you will have nice firm live cultured cream cheese that you can scrape out of the cheesecloth, plus about a cup of whey in your pitcher.  Use the whey in smoothies, baking, etc.

This would be great on homemade whole wheat bread!

Sunday, March 4, 2012

Whole Wheat Bread

My hubby and I are DONE with the 21-day purification program and we're looking forward to integrating a few items back into our diets.  Homemade bread is one of those delicious foods I have missed. 

When I'm in a hurry and I don't have time to really search for a recipe I typically use allrecipes.com.  I normally choose a very simple recipe for the ingredients I'd like to prepare and then amend to my (or my hubby's) liking.

Whole Wheat Bread 

Ingredients
3 cups warm water (110 degrees F/45 degrees C)
2 (.25 ounce) packages active dry yeast
1/3 cup honey
5 cups bread flour
3 tablespoons butter, melted
1/3 cup honey
1 tablespoon salt
3 1/2 cups whole wheat flour
2 tablespoons butter, melted

Directions
In a large bowl, mix warm water, yeast, and 1/3 cup honey. Add 5 cups white bread flour, and stir to combine. Let set for 30 minutes, or until big and bubbly.

Mix in 3 tablespoons melted butter, 1/3 cup honey, and salt. Stir in 2 cups whole wheat flour. Flour a flat surface and knead with whole wheat flour until not real sticky - just pulling away from the counter, but still sticky to touch. This may take an additional 2 to 4 cups of whole wheat flour. Place in a greased bowl, turning once to coat the surface of the dough. Cover with a dishtowel (or a large glass bowl). Let rise in a warm place until doubled.

Punch down, and divide into 3 loaves. Place in greased 9 x 5 inch loaf pans, and allow to rise until dough has topped the pans by one inch.

Bake at 350 degrees F (175 degrees C) for 25 to 30 minutes; do not overbake.

Lightly brush the tops of loaves with 2 tablespoons melted butter or margarine when done to prevent crust from getting hard. Cool completely

Friday, March 2, 2012

Friday Garden Update

Small Black Beauty Eggplant
Today is show and tell!  I'm so excited to share my baby Black Beauty Eggplants.  I'm almost embarrassed to admit that these stubborn plants have been growing in the garden for ALMOST A YEAR!  I didn't research Eggplants enough when I first planted them.  I didn't know that they will not bear fruit when it is too hot.
HELLO...I live in South Florida!
Bloom with Ladybug
The Bee-Friendly flowers I planted a few weeks ago are out and standing tall.

Marigolds
Cosmos
And now for the rest of the garden tour!
Red Potatoes
More Tomatoes!!!
Pimiento Peppers
Purple Top Whiteglobe Turnips
African Daisy

Have a Great Weekend!
HAPPY PLANTING!!!

Thursday, March 1, 2012

Seed-Starting Made Easy

There is a new product available at Mary's Heirloom Seeds called Jiffy 7 Peat Pellet.  A Peat Pellet is a small disc, containing weed-free professional grade Canadian Sphagnum peat.  
Pellet size:  42mm x 7mm (1.65” x  .28”)

Add water, and the Peat Pellet quickly swells to 7x its original size to become a perfect self contained pot with its own perfect medium for starting seeds.
The peat is held together by a biodegradable mesh net and can be transplanted with the seedling when roots push through the netting.  Peat Pellets are so easy to use, they make seed-starting simple and mess-free!  

From now until March 20th, Mary's Heirloom Seeds will include 6 free Peat Pellets in all seed orders over $25 
(plus FREE Priority Shipping).

Also available until March 20th, purchase 25 Peat Pellets and receive 5 EXTRA Peat Pellets AND a free extra Seed Pack 
(plus FREE Shipping).


Happy Planting!